Open the instructions below to learn how to save Zoom recordings to OneDrive without taking up space on your computer.
-
Create a OneDrive folder called Zoom Recordings.

-
Right-click the folder and select Free up space. You’ll see a white cloud icon next to the folder to mark that the contents of this folder won’t take up space on your computer’s hard drive while being saved to OneDrive.


-
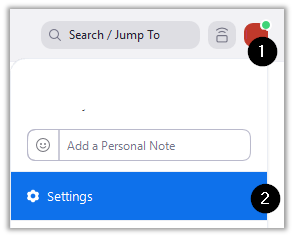
In Zoom, click your profile picture [1], followed by Settings [2]

-
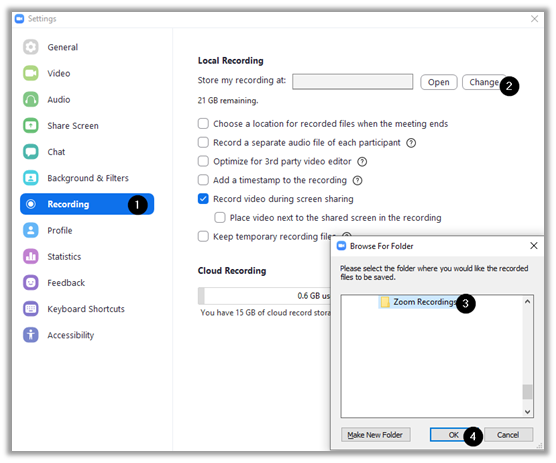
Go to the Recording [1] tab of the settings, click Change [2], navigate to your Zoom Recordings [3] folder, click OK [4]

-
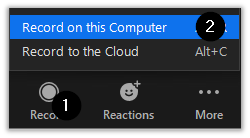
You can now save Zoom recordings to OneDrive without taking space up on your computer. When recording in Zoom, after pressing Record [1] make sure to select Record on this Computer [2] if given the option. If no option is given, it is the default.

- Follow the instructions noted in article Save disk space with OneDrive Files On-Demand for Mac to save files On-Demand for Mac, which will let you upload files without taking up space on your Mac.
-
In Zoom, click your profile picture [1], followed by Settings [2]

-
Go to the Recording [1] tab of the settings, click Change [2], navigate to your Zoom Recordings [3] folder, click OK [4]
